

Drawing A Line In Baseball
A baseball is a ball used in the bat-and-ball sport of the same name. The ball itself consists of a rubber or cork center wrapped in yarn and covered with white horsehide or cowhide.
Its circumference is approximately 9 to 9.25 inches and its weight is between 5 and 5.25 ounces.
Learning how to draw a baseball is important especially if you're planning to use the sports as a subject in your future drawings.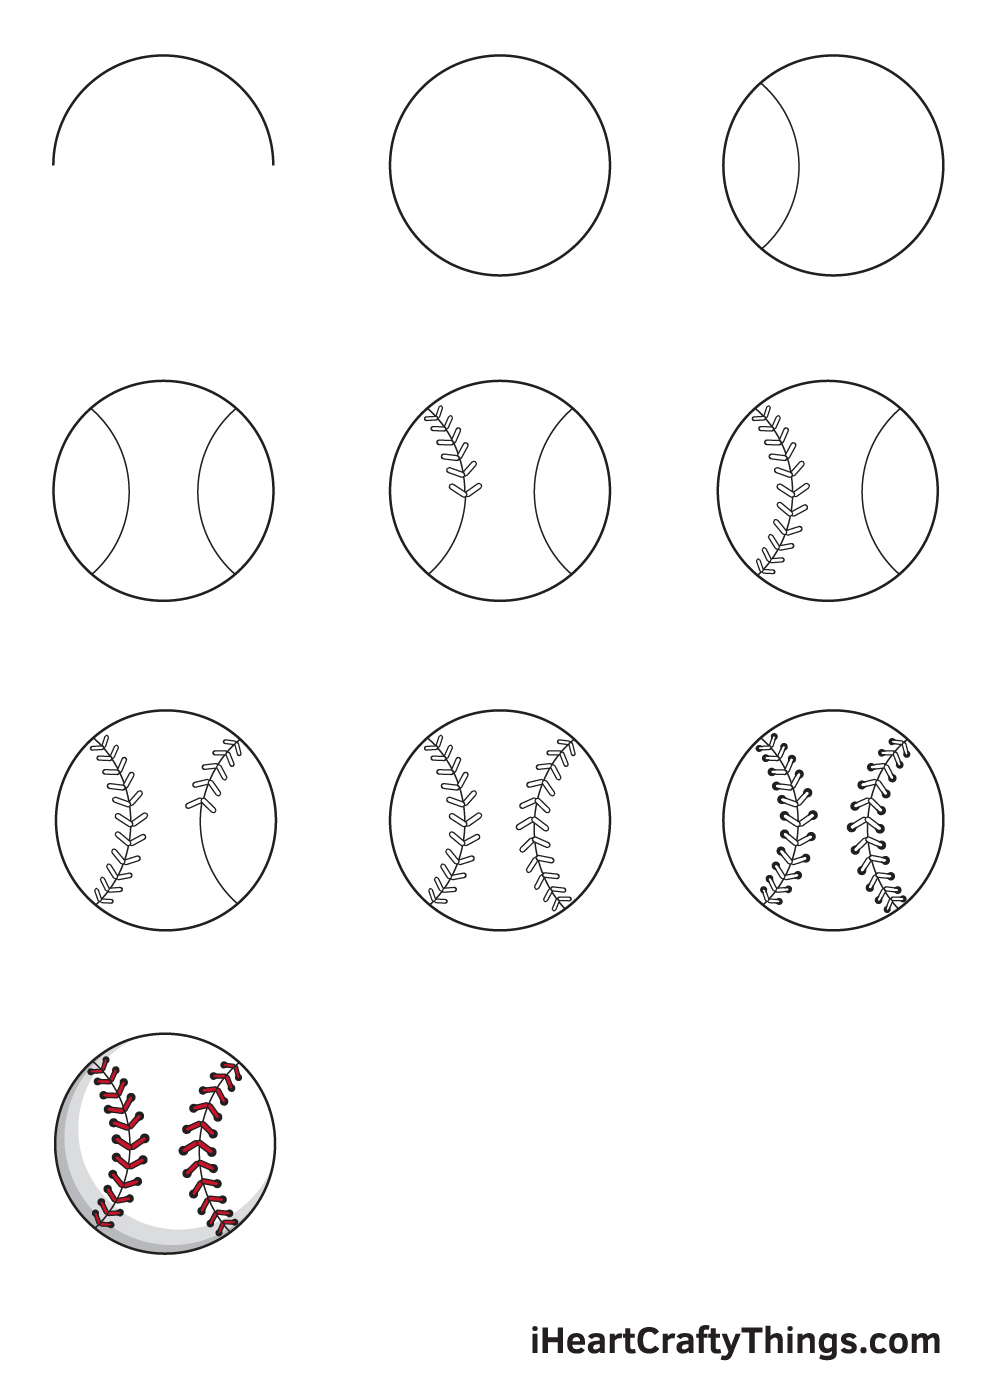
Once you can draw a baseball, you'll be capable of drawing much more complex sports drawings in the future.
To make it easier for you, we have created a step-by-step tutorial on how to draw a tutorial. This comprehensive guide consists of 9 easy instructions accompanied with simple illustrations. What's more, all you need is a pen and paper to draw a realistic looking baseball!
Take advantage of your artistic skills to create a baseball!
What's in this Blog Post
- How to Draw a Baseball — Let's get started!
- Step 1
- Step 2 — Create an Outline of the Baseball's Shape
- Step 3 — Next, Draw a Curved Line on the Left Side
- Step 4 — Draw a Curved Line on the Opposite Side
- Step 5 — Draw the Left Stitching Halfway Through
- Step 6 — Complete the Stitching on the Left Side
- Step 7 — Draw the Right Stitching Halfway Through
- Step 8 — Complete the Stitching on the Right Side
- Step 9 — Now, Magnify the Stitched Thread Holes
- Your Baseball Drawing is Complete!
How to Draw a Baseball — Let's get started!
Step 1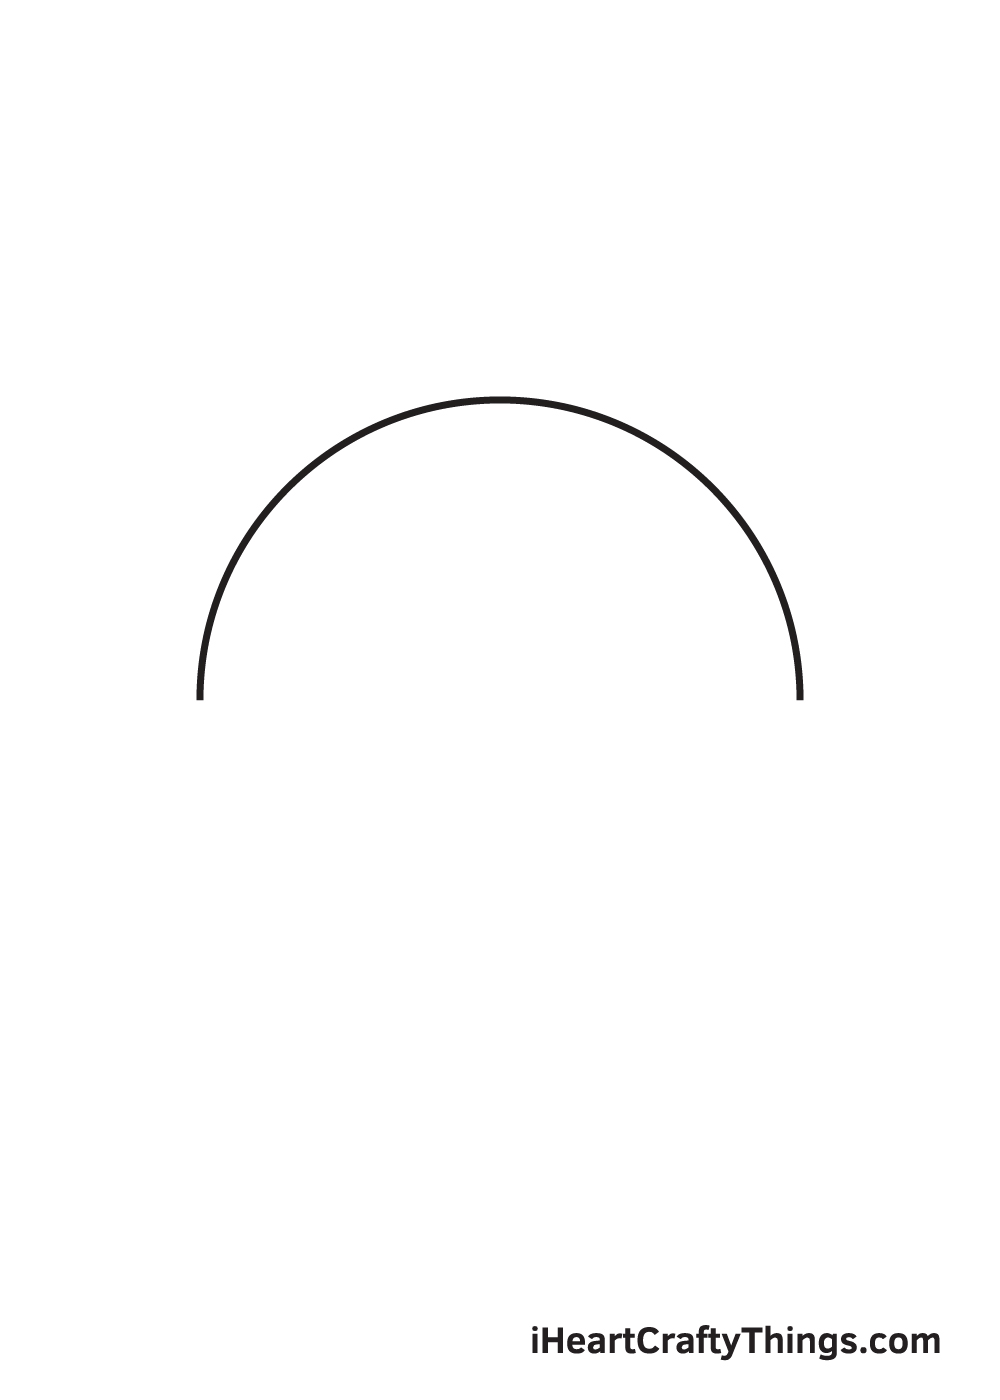
Start by drawing a downward curve above the middle of your paper. This forms the upper half of a perfect circle.
To ensure that the baseball will be drawn in the center, you can create reference lines by drawing an intersecting horizontal and vertical line across your paper.
The space right above the vertical line marks the spot where you should draw the semicircle.
Step 2 — Create an Outline of the Baseball's Shape
Draw the bottom half of the circle right below the semicircle that we drew in the previous step. This forms a full perfect circle shape of the baseball.
If you need help drawing a perfect circle, you can check out our tutorial on how to draw a circle from our drawing tutorials catalog.
You can also use a compass, which is a drawing tool that helps you draw a perfect circle shape quickly and easily.
Step 3 — Next, Draw a Curved Line on the Left Side
Draw a curved line on the left side of the baseball. Keep in mind that this curved line should be facing towards the left, as shown in the illustration.
This outlines the spot where we'll be adding the stitches later on.
Step 4 — Draw a Curved Line on the Opposite Side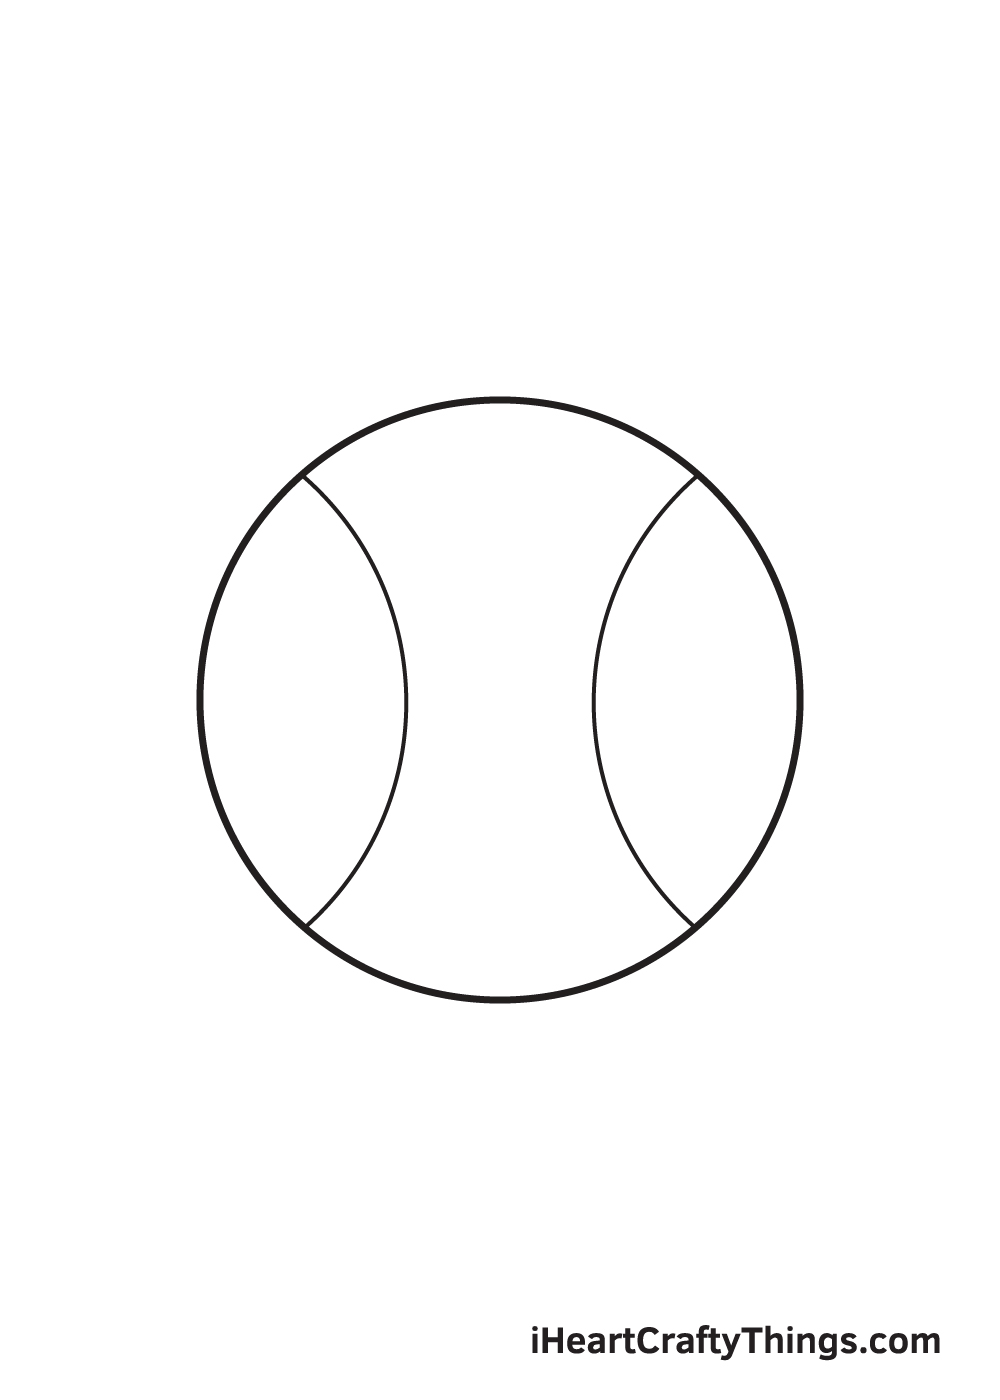
Repeat the previous step on the opposite side of the baseball.
At this point, the baseball should now have two curved lines facing the opposite directions.
Step 5 — Draw the Left Stitching Halfway Through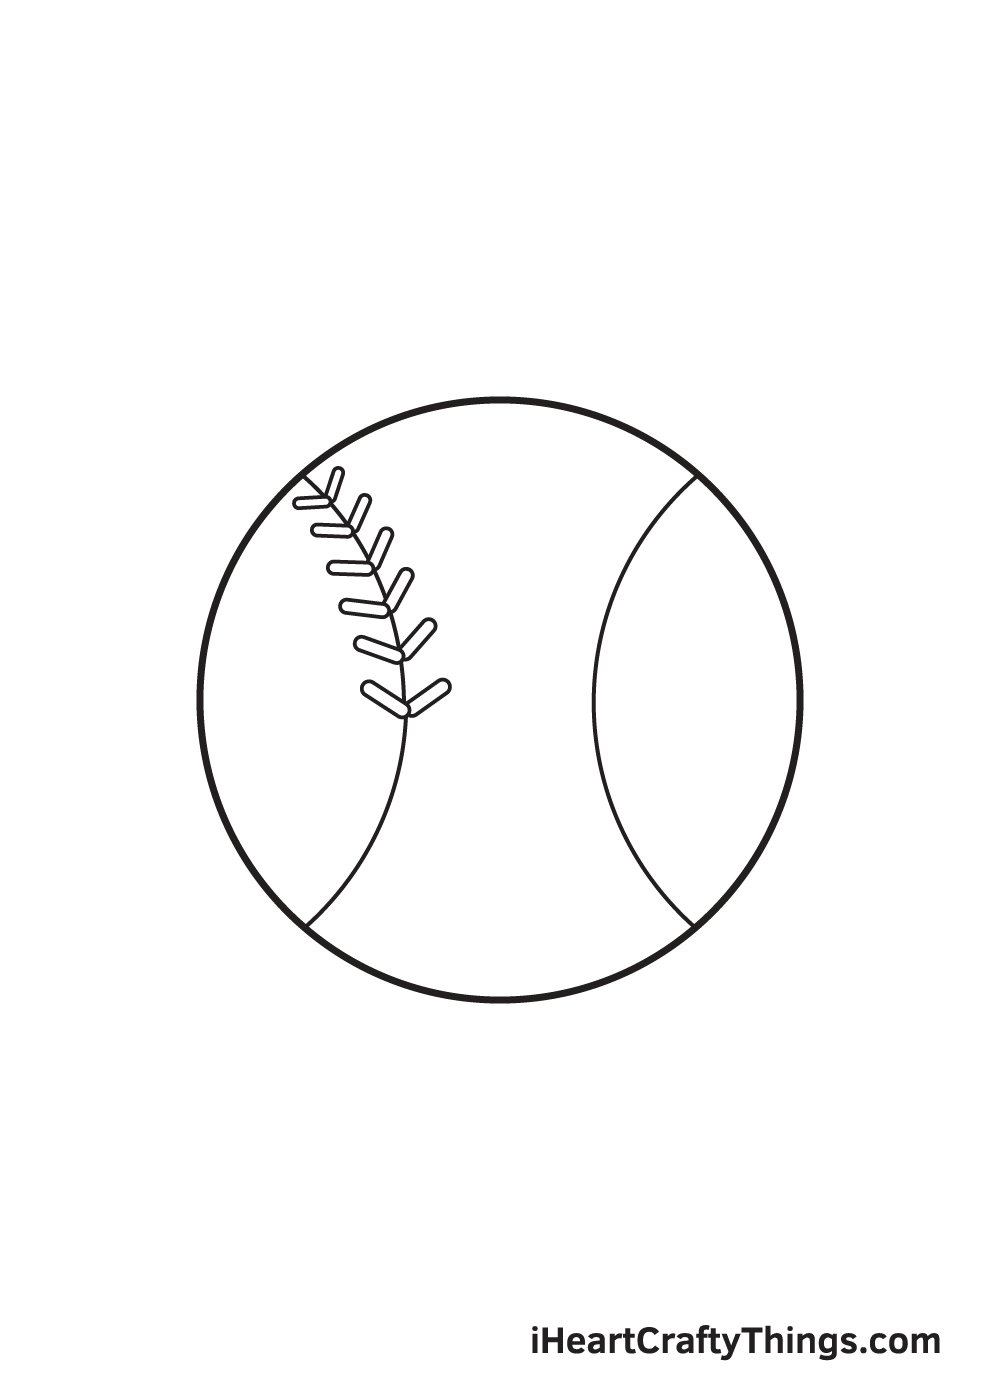
In this step, we'll be drawing the distinct stitching patterns on the surface of the baseball.
Continue by filling in the stitches starting from the top of the curved line on the left side. Draw two connected elongated ovals forming a wide "V" shape. This creates a single stitch thread.
Keep repeating the same steps until the upper half of the curved line is filled with stitches, as shown in the illustration above.
Step 6 — Complete the Stitching on the Left Side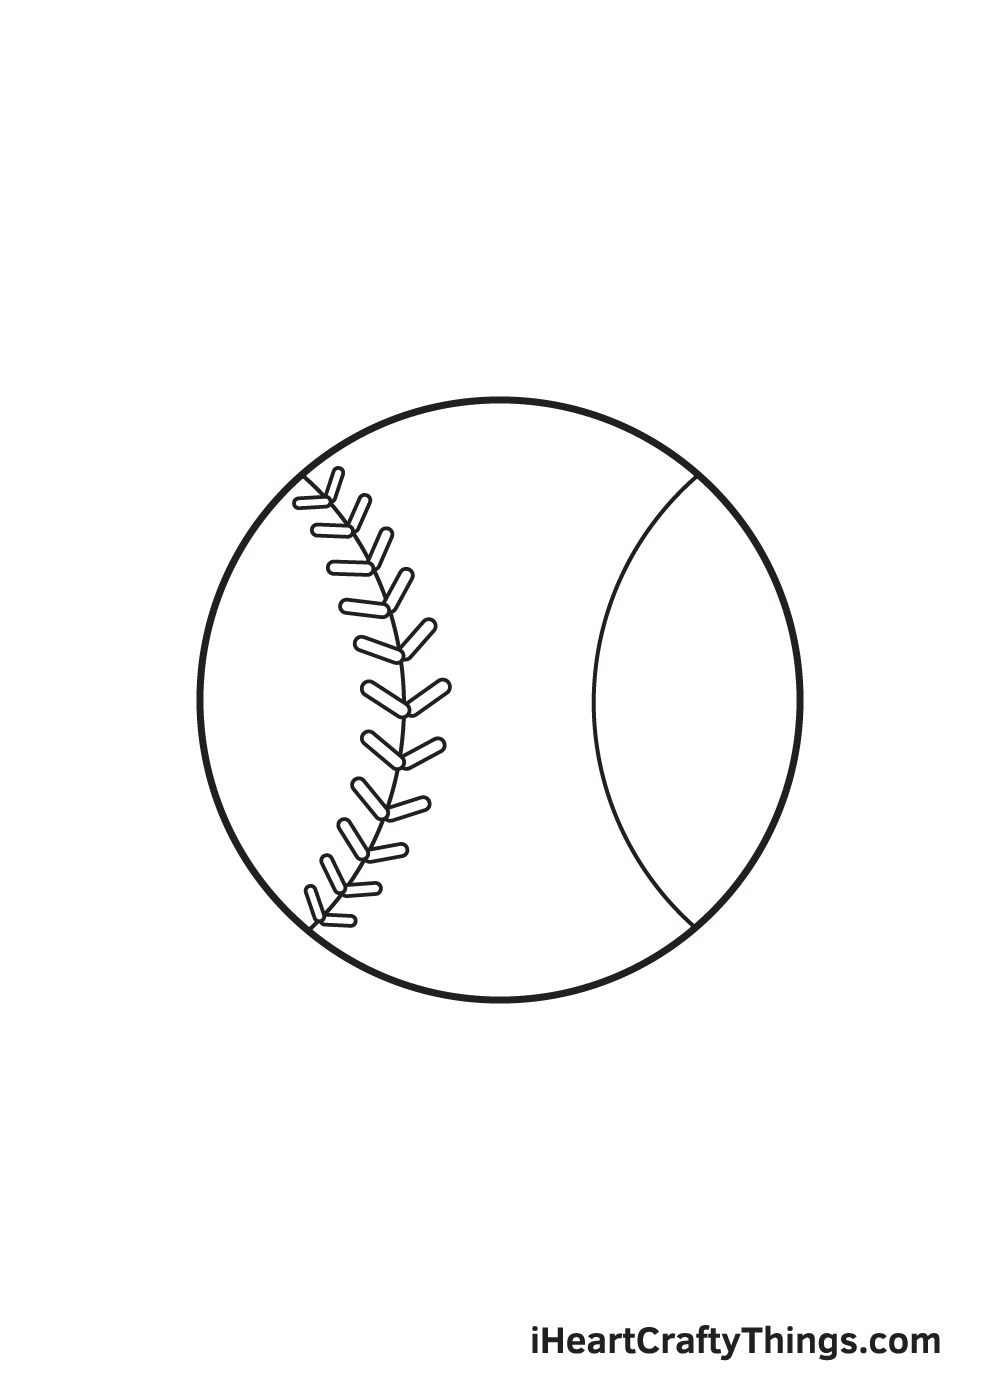
Keep drawing the same patterns that we tackled in the previous step until the left curved line is filled with stitching threads.
After finishing this step, the stitching on the left side of the baseball is now complete.
Step 7 — Draw the Right Stitching Halfway Through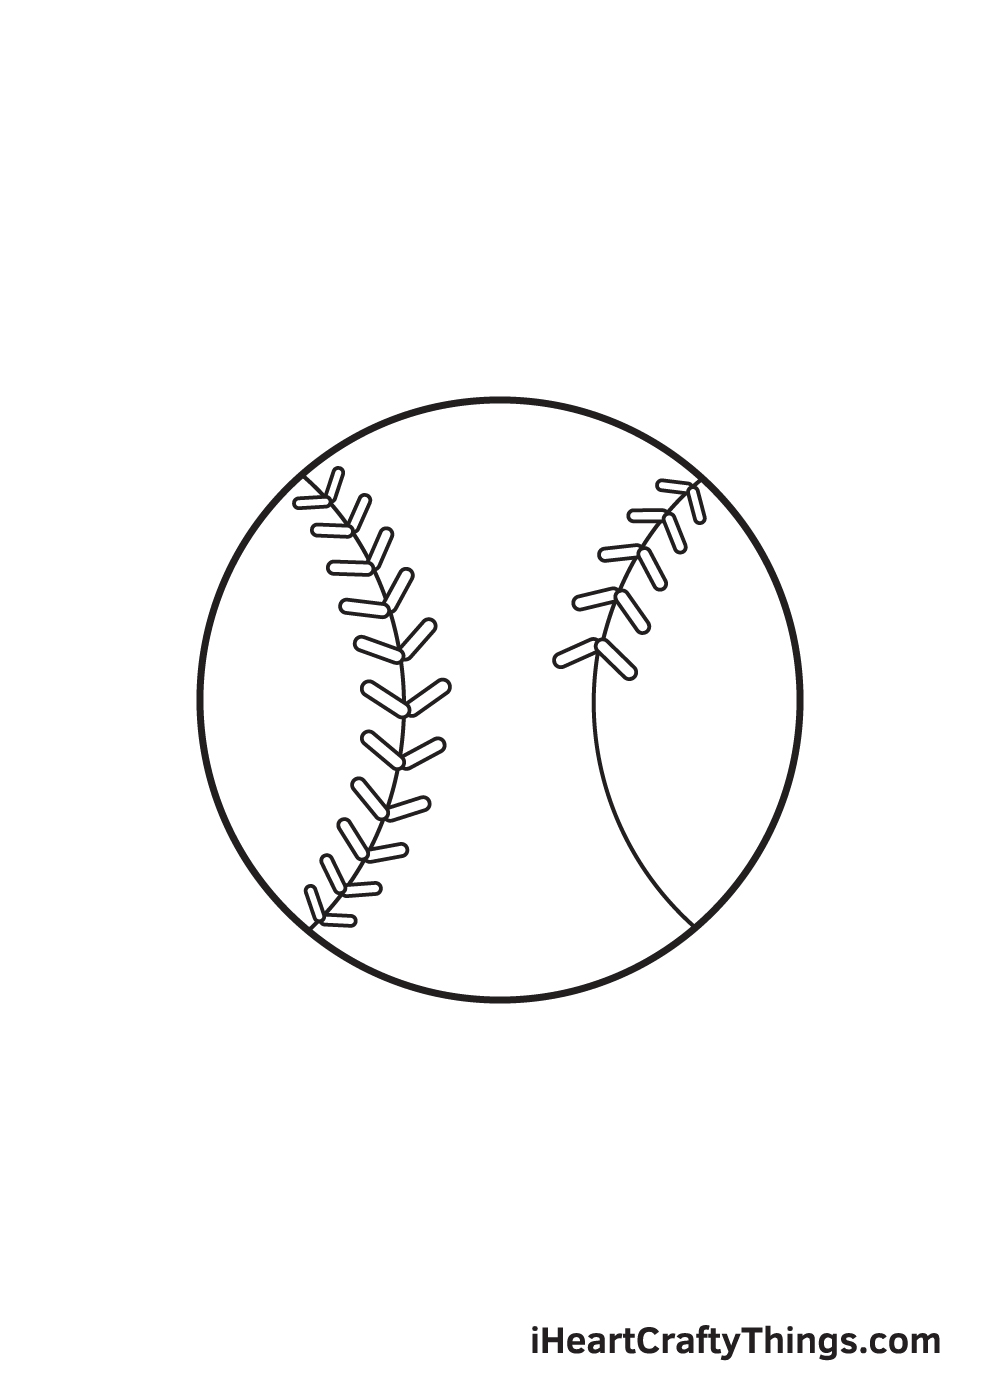
Moving on to the curved line on the right side, draw the similar stitching pattern starting from the top.
Afterwards, work your way downwards until the upper part of the curve is fully stitched.
Step 8 — Complete the Stitching on the Right Side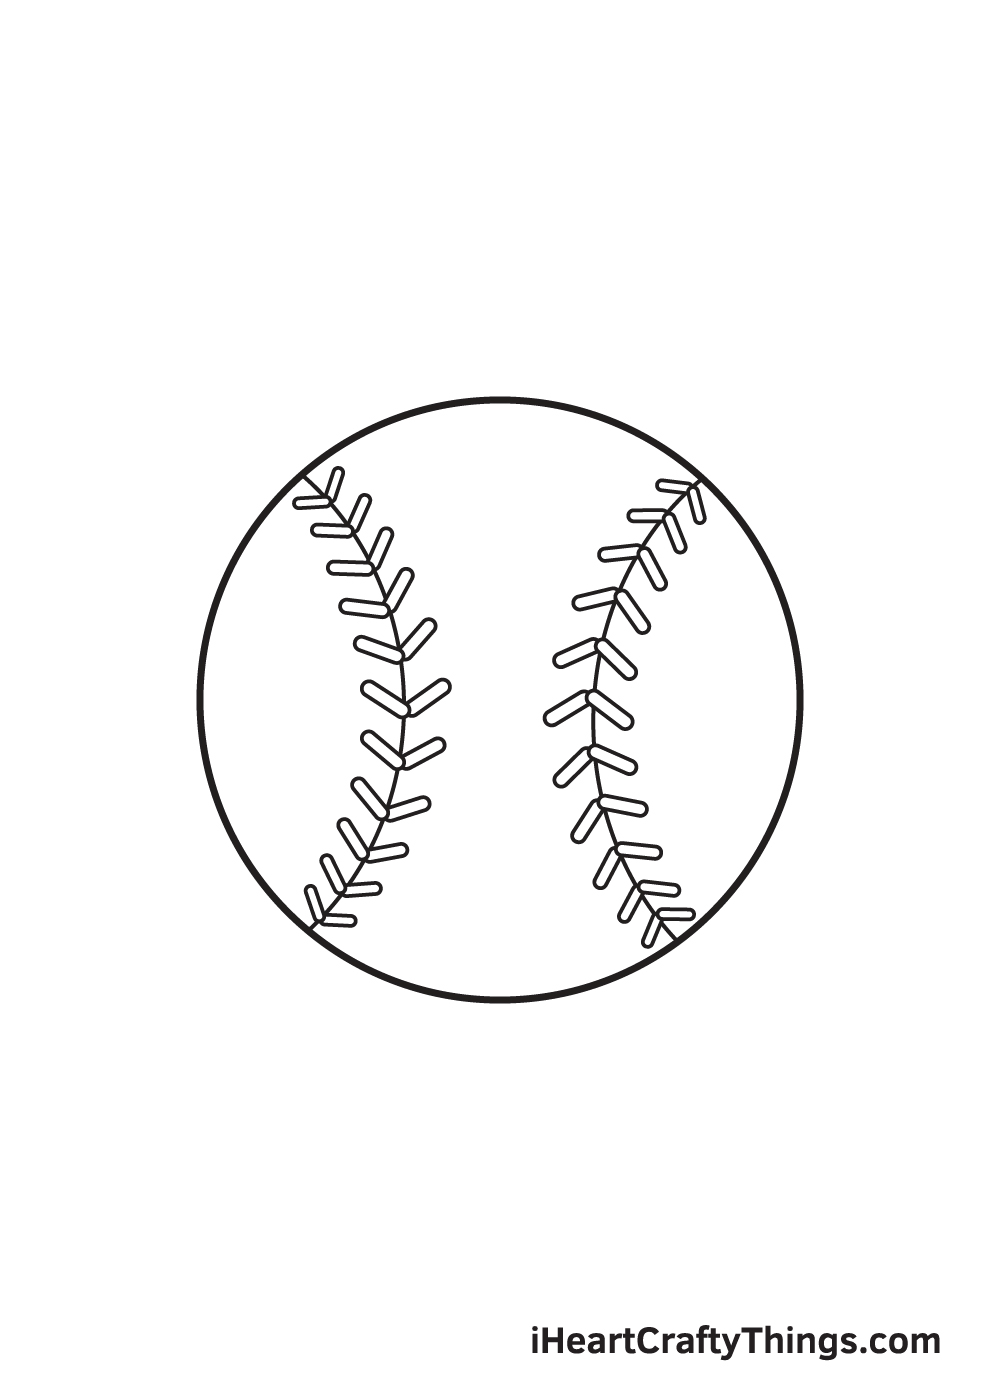
Repeat the previous step to complete the stitching threads pattern on the right curved line of the baseball.
At this point, the stitching pattern on both the left and right side of the baseball is complete.
Step 9 — Now, Magnify the Stitched Thread Holes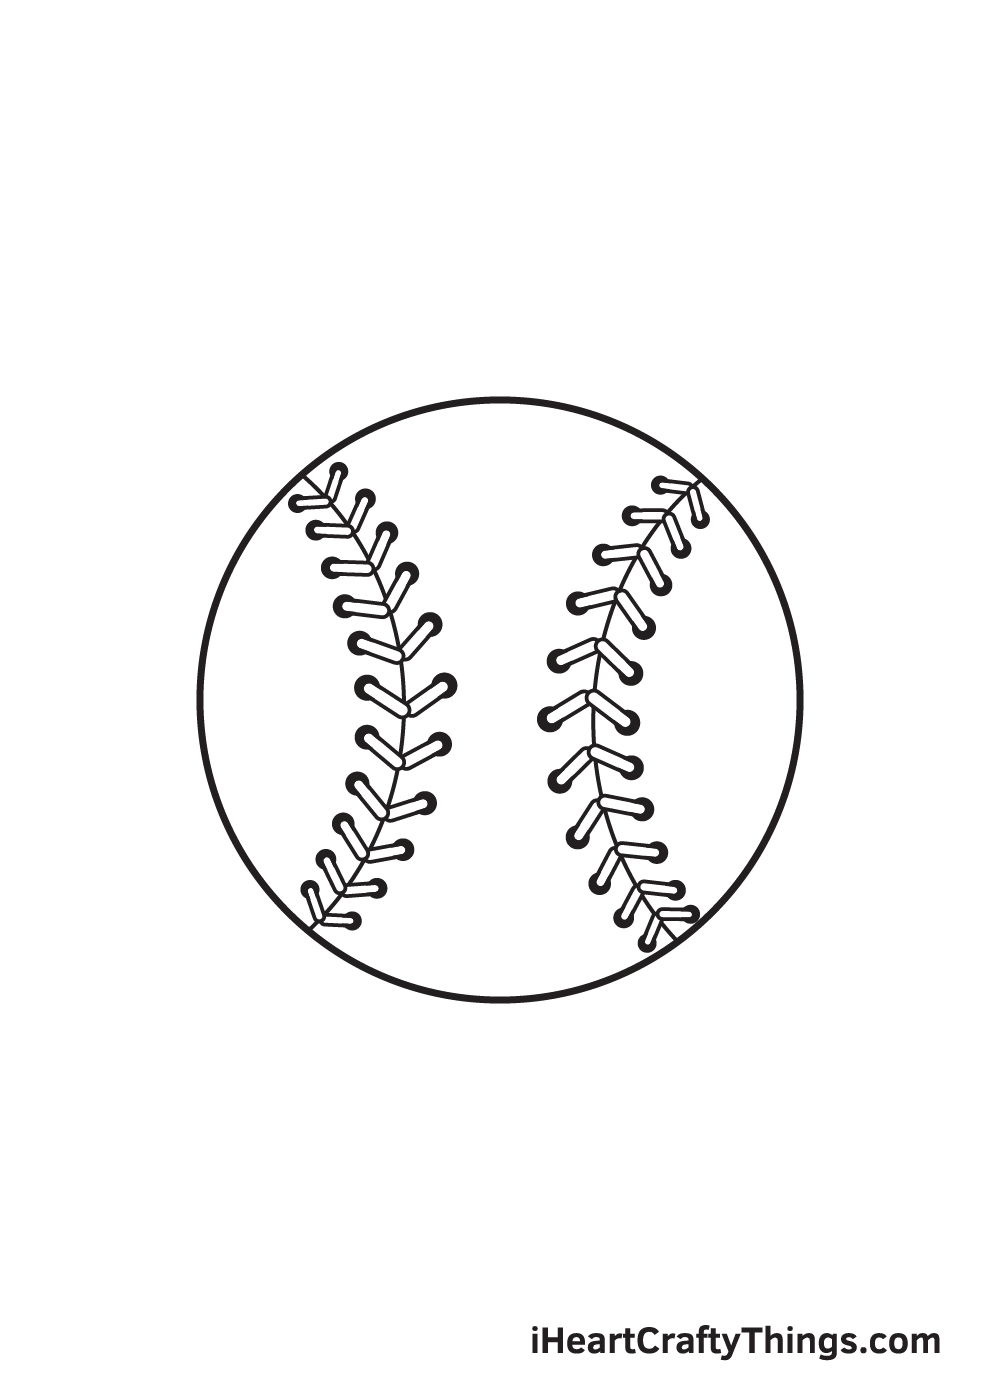
After creating the stitches, we will now be drawing the holes on the surface of the ball where the threads come and go.
A single stitch consists of two connected diagonal threads. On each endpoint of a single thread, draw a shaded circle surrounding the tip of each thread.
This creates the thread holes of the stitches. This also adds an elaborate detail on your drawing, making the baseball appear more realistic!
Now that we've successfully drawn a baseball, it's finally time for the most exciting part—choosing the colors and coloring your drawing!
As we all know, a baseball is colored white with red stitches. You can opt to color the baseball using its original colors or handpick a unique set of colors. Either way, we're sure the colors will turn out beautifully!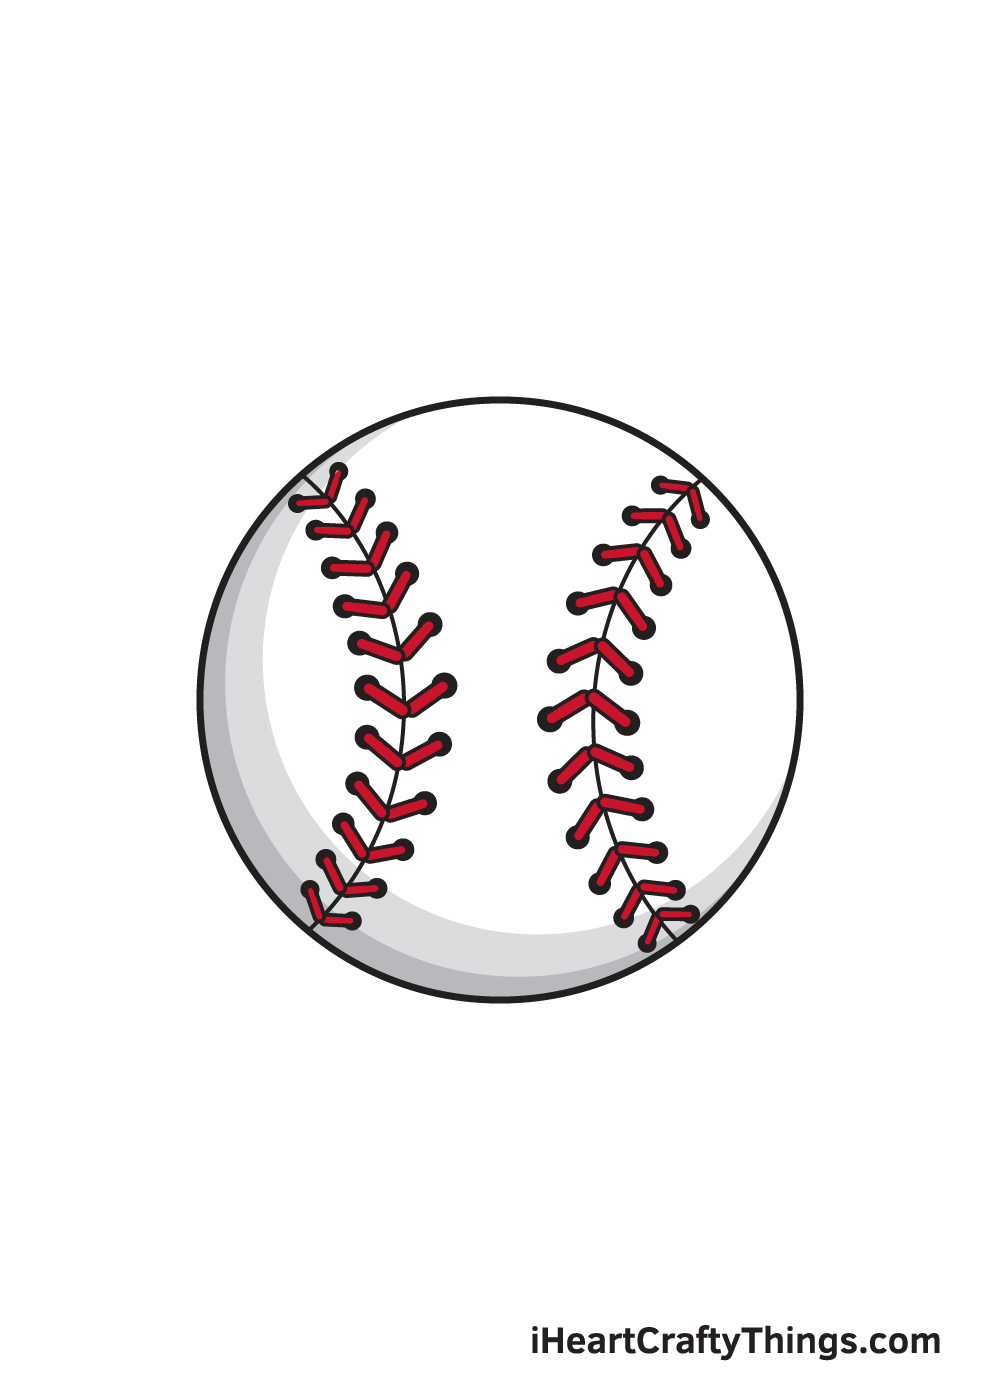
Your Baseball Drawing is Complete!
Hopefully, you have fun with this step-by-step baseball drawing. Now that you can draw a baseball, you can incorporate it into more complex sports drawing in the future.
Perhaps you can draw a baseball player holding a ball next?
Remember, all of our drawing tutorials are 100% free for you to use as learning materials to help you draw human beings, animals, and different objects.
We are regularly uploading new content on our "How to Draw" catalog so you can continuously enjoy brand-new drawing tutorials. What would you like to learn how to draw next? Let us know!
Don't forget to take a picture of your colored drawing once you're done! Make sure to show off your masterpiece on our Facebook page and on Pinterest.
And while you're at it, we hope you take the time to like our Facebook page too!
We're excited to see your realistic baseball drawing!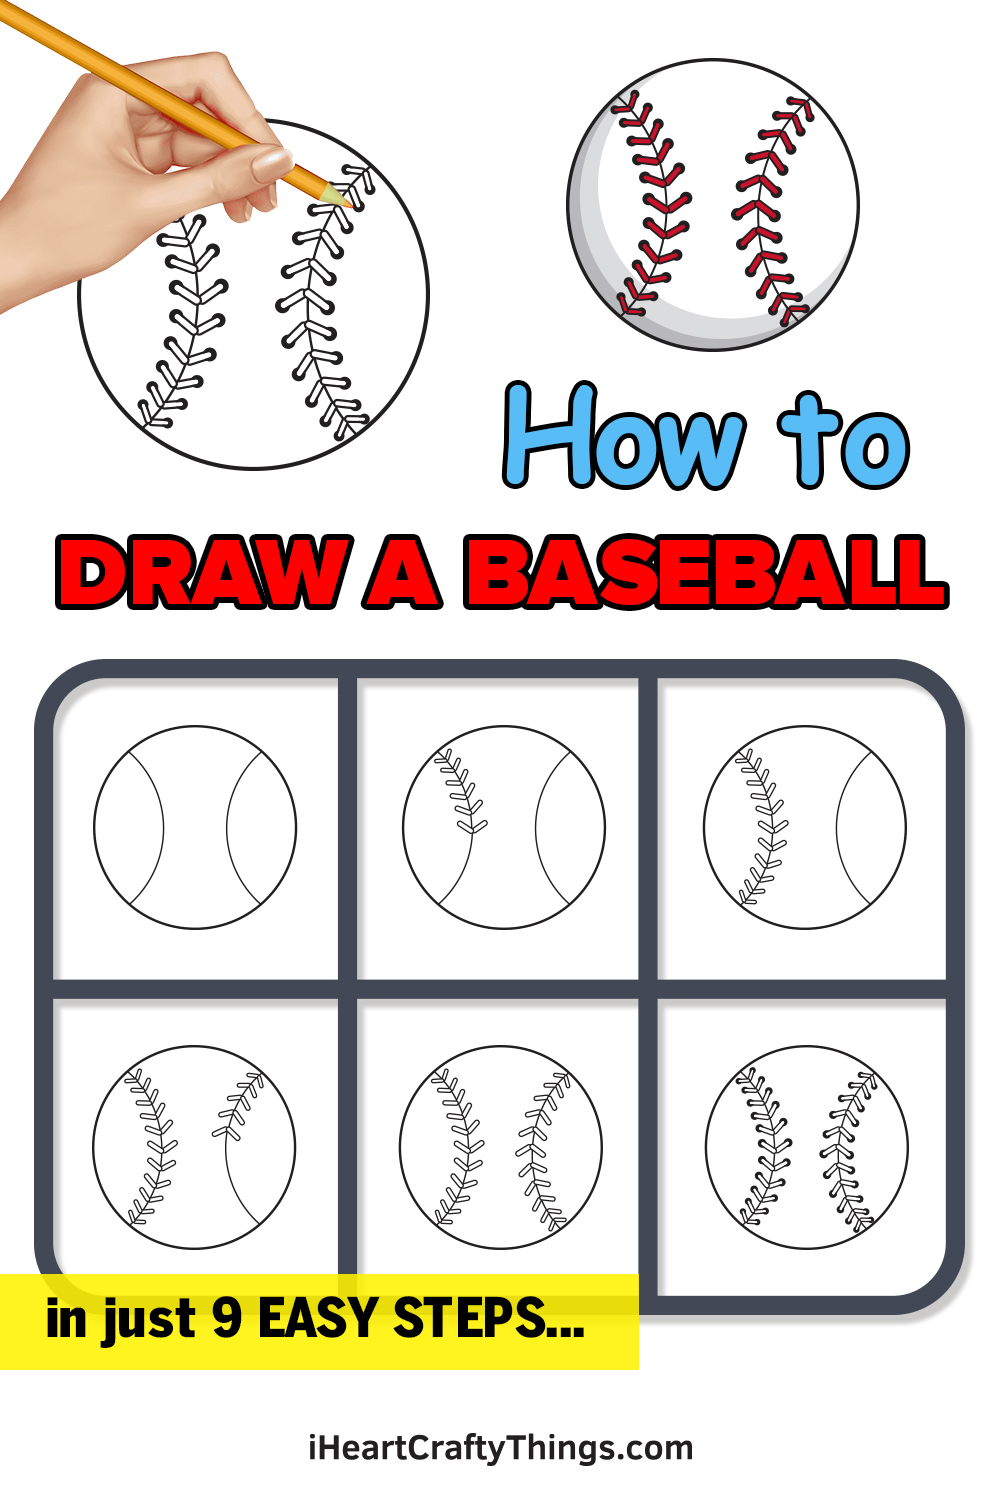
Drawing A Line In Baseball
Source: https://iheartcraftythings.com/baseball-drawing.html
Posted by: mendelfroule.blogspot.com
0 Response to "Drawing A Line In Baseball"
Post a Comment