

How To Create A Domain_9 Banner Image
This browser is no longer supported.
Upgrade to Microsoft Edge to take advantage of the latest features, security updates, and technical support.
- Feedback
- Edit
Add branding to your organization's Azure Active Directory sign-in page
- 7 minutes to read
Thank you.
Use your organization's logo and custom color schemes to provide a consistent look-and-feel on your Azure Active Directory (Azure AD) sign-in pages. Your sign-in pages appear when users sign in to your organization's web-based apps, such as Microsoft 365, which uses Azure AD as your identity provider.
Note
Azure AD Premium editions are available for customers in China using the worldwide instance of Azure Active Directory. Azure AD Premium editions aren't currently supported in the Azure service operated by 21Vianet in China. For more information, talk to us using the Azure Active Directory Forum.
Customize your Azure AD sign-in page
You can customize your Azure AD sign-in pages, which appear when users sign in to your organization's tenant-specific apps, such as https://outlook.com/contoso.com, or when passing a domain variable, such as https://passwordreset.microsoftonline.com/?whr=contoso.com.
Your custom branding won't immediately appear when your users go to sites such as, www.office.com. Instead, the user has to sign-in before your customized branding appears. After the user has signed in, the branding may take 15 minutes or longer to appear.
Note
Additionally, sign-in page branding doesn't carry over to personal Microsoft accounts. If your users or business guests sign in using a personal Microsoft account, the sign-in page won't reflect the branding of your organization.
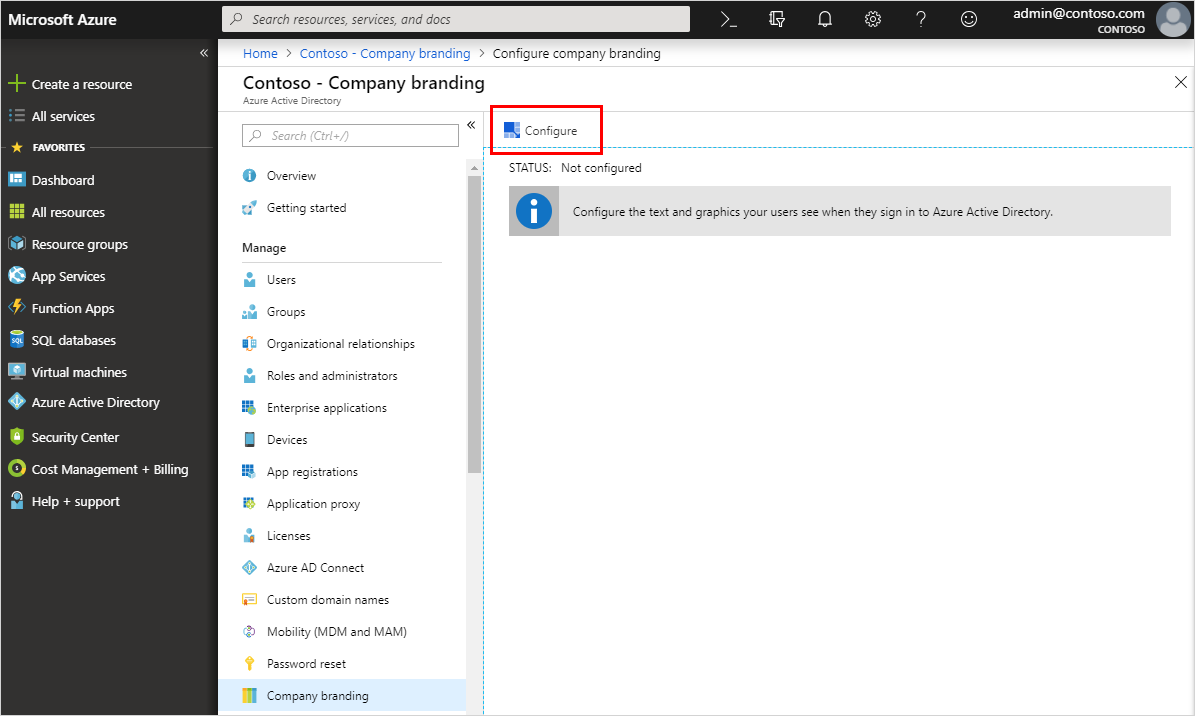
To configure your branding for the first time
-
Sign in to the Azure portal using a Global administrator account for the directory.
-
Select Azure Active Directory, and then select Company branding, and then select Configure.
-
On the Configure company branding page, provide any or all of the following information.
Important
All the custom images you add on this page have image size (pixels), and potentially file size (KB), restrictions. Because of these restrictions, you'll most-likely need to use a photo editor to create the right-sized images.
-
General settings

-
Language. The language is automatically set as your default and can't be changed.
-
Sign-in page background image. Select a .png or .jpg image file to appear as the background for your sign-in pages. The image will be anchored to the center of the browser, and will scale to the size of the viewable space. You can't select an image larger than 1920x1080 pixels in size or that has a file size more than 300,000 bytes.
It's recommended to use images without a strong subject focus, e.g., an opaque white box appears in the center of the screen, and could cover any part of the image depending on the dimensions of the viewable space.
-
Banner logo. Select a .png or .jpg version of your logo to appear on the sign-in page after the user enters a username and on the My Apps portal page.
The image can't be taller than 60 pixels or wider than 280 pixels, and the file shouldn't be larger than 10KB. We recommend using a transparent image since the background might not match your logo background. We also recommend not adding padding around the image or it might make your logo look small.
-
Username hint. Type the hint text that appears to users if they forget their username. This text must be Unicode, without links or code, and can't exceed 64 characters. If guests sign in to your app, we suggest not adding this hint.
-
Sign-in page text and formatting. Type the text that appears on the bottom of the sign-in page. You can use this text to communicate additional information, such as the phone number to your help desk or a legal statement. This text must be Unicode and not exceed 1024 characters.
You can customize the sign-in page text you entered. To begin a new paragraph, use the enter key twice. You can also change text formatting to include bold, italics, an underline or clickable link. Use the following syntax to add formatting to text:
Hyperlink:
[text](link)Bold:
**text**or__text__Italics:
*text*or_text_Underline:
++text++Important
Hyperlinks that are added with sign-in page text render as text in native environments, like in desktop and mobile applications.
-
-
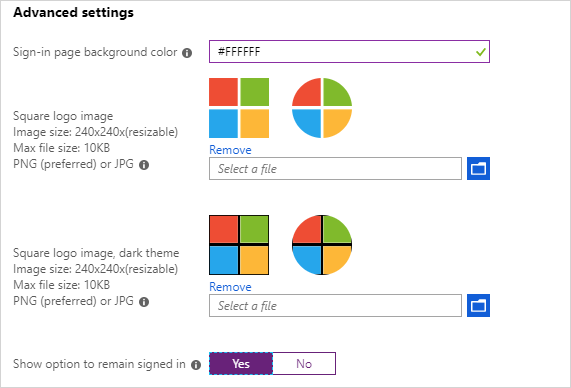
Advanced settings
-
Sign-in page background color. Specify the hexadecimal color (for example, white is #FFFFFF) that will appear in place of your background image in low-bandwidth connection situations. We recommend using the primary color of your banner logo or your organization color.
-
Square logo image. Select a .png (preferred) or .jpg image of your organization's logo to appear to users during the setup process for new Windows 10 Enterprise devices. This image is only used for Windows authentication and appears only on tenants that are using Windows Autopilot for deployment or for password entry pages in other Windows 10 experiences. In some cases it may also appear in the consent dialog.
The image can't be larger than 240x240 pixels in size and must have a file size of less than 10 KB. We recommend using a transparent image since the background might not match your logo background. We also recommend not adding padding around the image or it might make your logo look small.
-
Square logo image, dark theme. Same as the square logo image above. This logo image takes the place of the square logo image when used with a dark background, such as with Windows 10 Azure AD joined screens during the out-of-box experience (OOBE). If your logo looks good on white, dark blue, and black backgrounds, you don't need to add this image.
Important
Transparent logos are supported with the square logo image. However, the color palette used in the transparent logo could conflict with backgrounds (such as, white, light grey, dark grey, and black backgrounds) used within Microsoft 365 apps and services that consume the square logo image. Solid color backgrounds may need to be used to ensure the square image logo is rendered correctly in all situations.
-
Show option to remain signed in. You can choose to let your users remain signed in to Azure AD until explicitly signing out. If you choose No, this option is hidden, and users must sign in each time the browser is closed and reopened.
This capability is only available on the default branding object and not on any language-specific object. To learn more about configuring and troubleshooting the option to remain signed in, see Configure the 'Stay signed in?' prompt for Azure AD accounts
Note
Some features of SharePoint Online and Office 2010 depend on users being able to choose to remain signed in. If you set this option to No, your users may see additional and unexpected prompts to sign-in.
-
-
-
After you've finished adding your branding, select Save.
This process creates your first custom branding configuration, and it becomes the default for your tenant. The default custom branding configuration serves as a fallback option for all language-specific branding configurations. The configuration can't be removed after you create it.
Important
To add more corporate branding configurations to your tenant, you must choose New language on the Contoso - Company branding page. This opens the Configure company branding page, where you can follow the same steps as above.
Update your custom branding
After you've created your custom branding, you can go back and change anything you want.
To edit your custom branding
-
Sign in to the Azure portal using a Global administrator account for the directory.
-
Select Azure Active Directory, and then select Company branding, and then select Configure.

-
On the Configure company branding page, add, remove, or change any of the information, based on the descriptions in the Customize your Azure AD sign-in page section of this article.
-
Select Save.
It can take up to an hour for any changes you made to the sign-in page branding to appear.
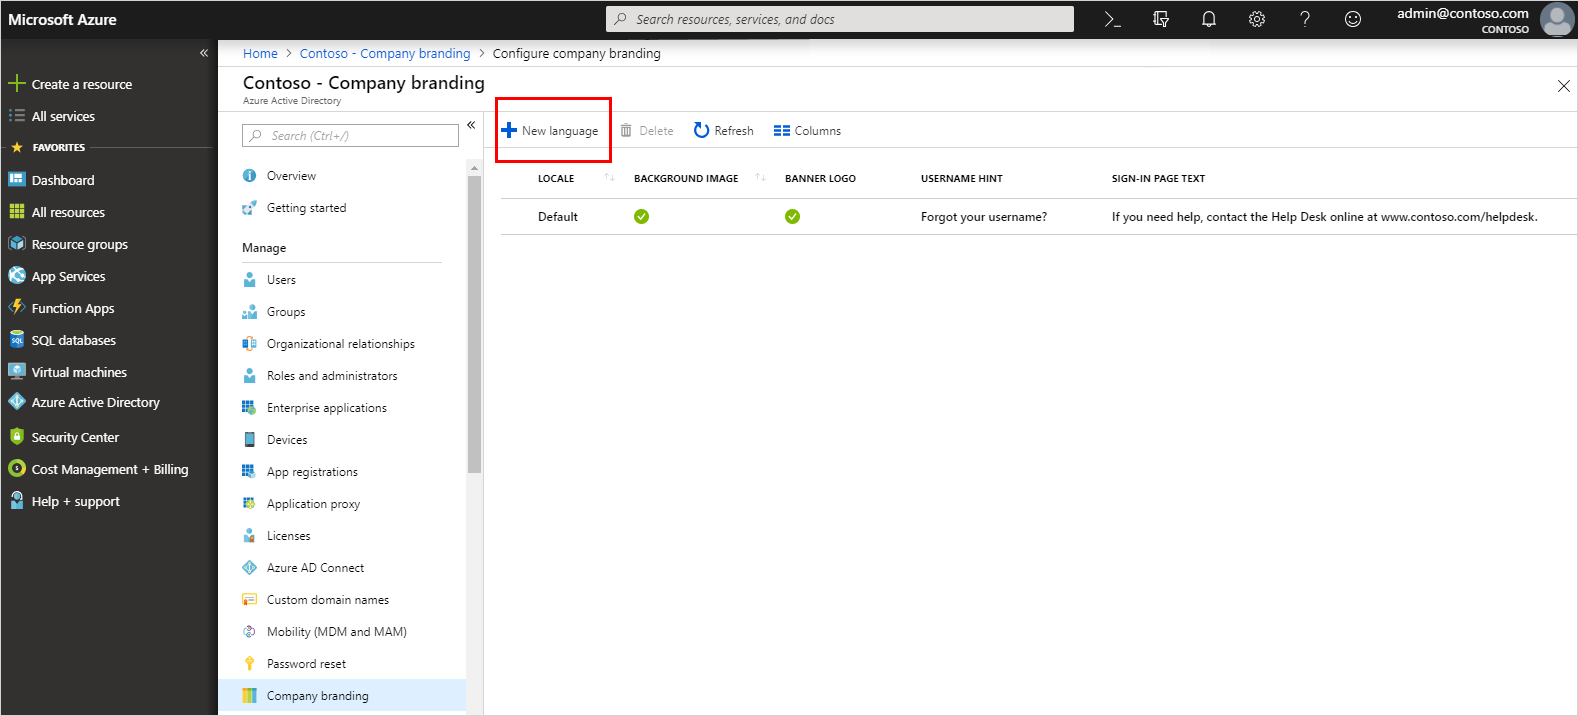
Add language-specific company branding to your directory
You can't change your original configuration's language from your default language. However, if you need a configuration in a different language, you can create a new configuration.
To add a language-specific branding configuration
-
Sign in to the Azure portal using a Global administrator account for the directory.
-
Select Azure Active Directory, and then select Company branding, and then select New language.
-
On the Configure company branding page, select your language (for example, French) and then add your translated information, based on the descriptions in the Customize your Azure AD sign-in page section of this article.
-
Select Save.
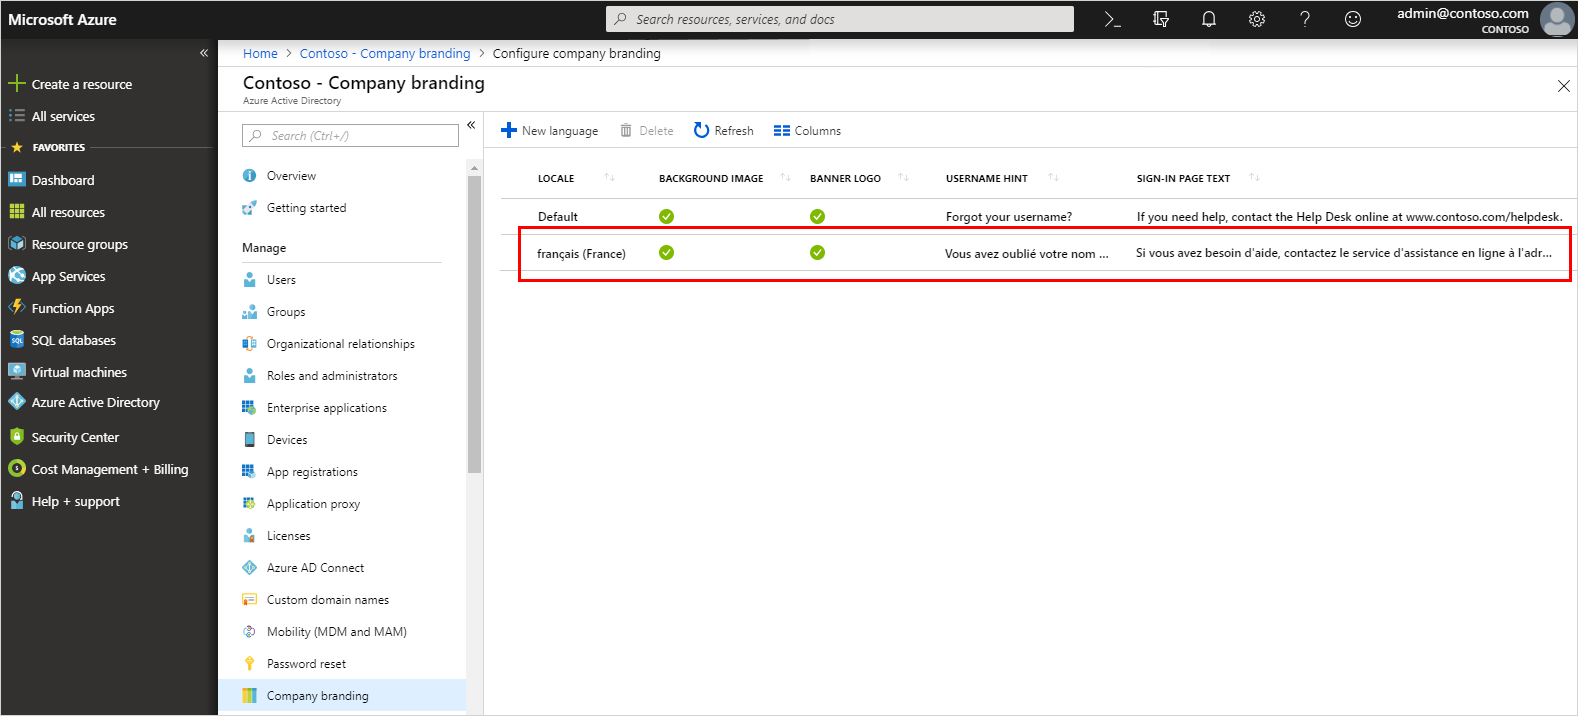
The Contoso – Company branding page updates to show your new French configuration.
Add your custom branding to pages
Add your custom branding to pages by modifying the end of the URL with the text, ?whr=yourdomainname. This specific modification works on different types of pages, including the Multi-Factor Authentication (MFA) setup page, the Self-service Password Reset (SSPR) setup page, and the sign in page.
Whether an application supports customized URLs for branding or not depends on the specific application, and should be checked before attempting to add a custom branding to a page.
Examples:
Original URL: https://aka.ms/MFASetup
Custom URL: https://account.activedirectory.windowsazure.com/proofup.aspx?whr=contoso.com
Original URL: https://aka.ms/SSPR
Custom URL: https://passwordreset.microsoftonline.com/?whr=contoso.com
Feedback
How To Create A Domain_9 Banner Image
Source: https://docs.microsoft.com/en-us/azure/active-directory/fundamentals/customize-branding
Posted by: mendelfroule.blogspot.com
0 Response to "How To Create A Domain_9 Banner Image"
Post a Comment