How To Create A Website Using Html Css And Bootstrap
Gone are the days when creating a Bootstrap website was a pretty complicated task. Earlier for a different device like a PC or a mobile, it was required to create a different website with distinct features. But with the advancement in technology creating a Bootstrap website has turned into a hassle-free task. And technology like Bootstrap 4 has made it even simpler. For those who are struggling with how to create a Bootstrap website from scratch, this tutorial is all you have been looking for Bootstrap website development.
Bootstrap 4 is an extremely popular HTML, CSS, and JavaScript framework for developing responsive websites and web applications. It is used to build responsive and mobile-first websites. However, Bootstrap 4 is easy to understand and has dynamic features. Bootstrap 4 provides you with everything you need to create a Bootstrap website from scratch. Bootstrap 4 is an absolutely free and open-source front-end framework to use.
For all those who are short on time and want to directly jump to a particular topic. Here is a quick preview on how to create a Bootstrap website, choose, skip, and read as per your choice.
- Why Use Bootstrap 4?
- Ways to Create Bootstrap Website
- Create Bootstrap Website by Manual Method
- Step 1: Download Bootstrap 4
- Step 2: Create an HTML directory
- Step 3. Copy JS and CSS Files
- Step 4. Link Bootstrap CSS File
- Step 5. Add Core Bootstrap JavaScript
- Create a Responsive Website using Bootstrap 4
- Create Bootstrap Website with TemplateToaster Bootstrap website builder
- Step 1: Choose CMS Platform
- Step 2: Choose a sample template
- Step 3. Go to the General tab
- Step 4. Setup layout
- Step 5. Go to the menu tab
- Step 6. Add a slideshow to the website
- Step 7. Change content in the content area
- Step 8. Create your Footer
Why Use Bootstrap 4?
When Bootstrap 4 is compared to many other frameworks, it is undeniably leading them all. Because it is mobile-first, responsive, and developed along with HTML, CSS, and JavaScript. There are a great number of resources accessible for Bootstrap 4 and that makes it more desirable. Bootstrap 3 vs Bootstrap 4. should you move? What are the differences?
Mobile-first has a huge significance. By mobile-first it means that Bootstrap 4 emphasizes creating a website for the mobile device first. And later enhancing the website to render on other large-size devices.
How to Create a Bootstrap Website
Bootstrap 4 is a user-friendly framework that doesn't need you to be a master in CSS and HTML. Bootstrap 4 is highly compatible with all the latest browsers. It is a detailed tutorial for beginners on how to create a Bootstrap website.
Ways to Create Bootstrap Website From Scratch
The two basic methods to create Bootstrap 4 website.
- Create Bootstrap Website by Manual Method
- Create Bootstrap Website Using TemplateToaster Bootstrap Website Builder
Let's see both the methods one by one and then you decide which way to create a Bootstrap website is the best fit for you.
Create Bootstrap Website by Manual Method
Steps to Create a Bootstrap Website by Manual Method
Step 1: Download from the official website of Bootstrap 4. Now, unzip the Bootstrap 4 files.
Step 2: Create an HTML directory name it. You can give it any name you prefer.
and Step 3: Copy the JS and the CSS files in your HTML directory which you get after downloading Bootstrap 4 and create an index.html file.
Step 4: Link your Bootstrap CSS file, you need to copy the below-given code and paste it in the index.html file under the <head> tag.
<!-- Bootstrap core CSS → <link href="css/bootstrap.css" rel="stylesheet">
Step 5: In the same manner, add core Bootstrap JavaScript after Footer of index.html to quickly load the page.
<script src="https://ajax.googleapis.com/ajax/libs/jquery/1.12.4/jquery.min.js"></script> <script src="js/bootstrap.js"></script>
So, this is how you need to link the Bootstrap files to HTML.
Create a Responsive Website Using Bootstrap 4
Now, you will learn how to create a responsive website using Bootstrap 4. For a clearer picture, I will categorize the page into 4 different sections so that it becomes easy for you to understand the concept of creating a responsive website using Bootstrap 4.
And the sections are:
- The Responsive Navigation:- The responsive navigation bar of the website will contain the Logo of your website, the Menu items on the website which can be aligned to the right or left as per your project's need.
- The Header:- You can apply a background image, foreground image, and some content in the header.
- The Content:- The content area is the main area where you will show your content on the website.
- The Footer:- You can design the footer as per your choice keeping it one-column or multi-column is your choice. You can place the Social icons, Copyright information, and other legal information like Terms of use and Privacy Policy, etc.
Once you are ready with the four sections your responsive page is ready. And this how quickly you can create the rest of the pages for your website. Now we look at how effortlessly you can create a Bootstrap website with the help of TemplateToaster Bootstrap website builder. Check out Bootstrap vs Foundation.
Create Bootstrap Website with TemplateToaster Bootstrap Builder
Let's now analyze the simplest approach to create a Bootstrap website with TemplateToaster. Every page you create with TemplateToaster Bootstrap builder is by default is responsive in nature, so you don't have to do extra efforts to make your theme responsive.
Create Bootstrap Website with TemplateToaster Bootstrap Website Builder Step-by-Step
Here is Step 1: Choose CMS Platform
Download and install TemplateToaster on your computer. First and foremost choose the CMS and pick any CMS you name like WordPress, Joomla, Drupal, Magento, etc. if you wish to create a dynamic website. Whereas, in order to create a static website, you need to choose HTML.
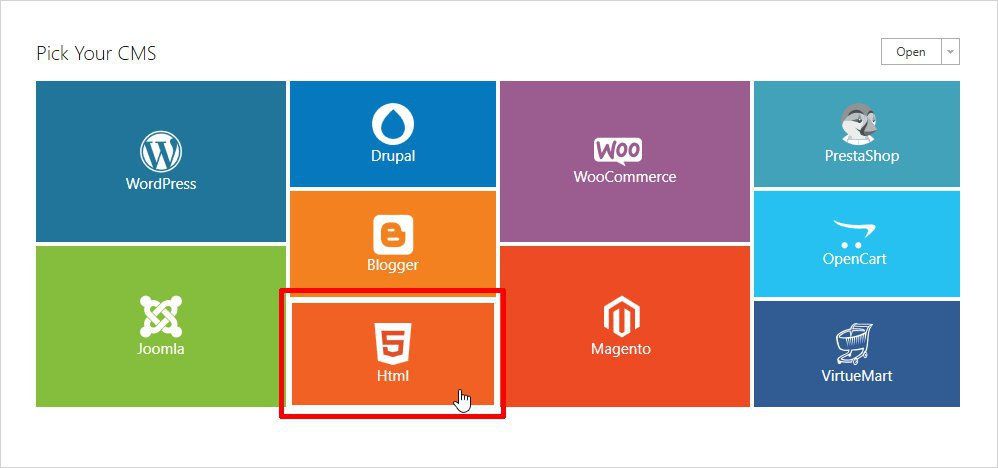
and Step 2: Choose a Sample Template
Now, decide if you want to go with the Sample Template or you want to create your own template from scratch. I am using the Sample template here, easily downloaded from the template gallery.
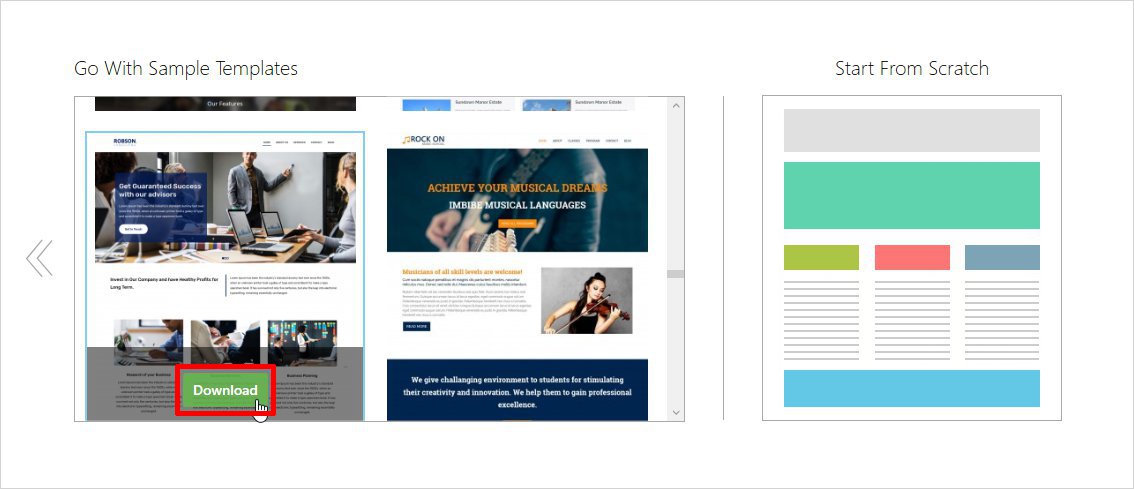
Step 3: Go to the General Tab
With the sample template under the General tab, you can delve into various options such as favicons, sidebar, typography, etc. Similarly, you can set the website preferences as well.
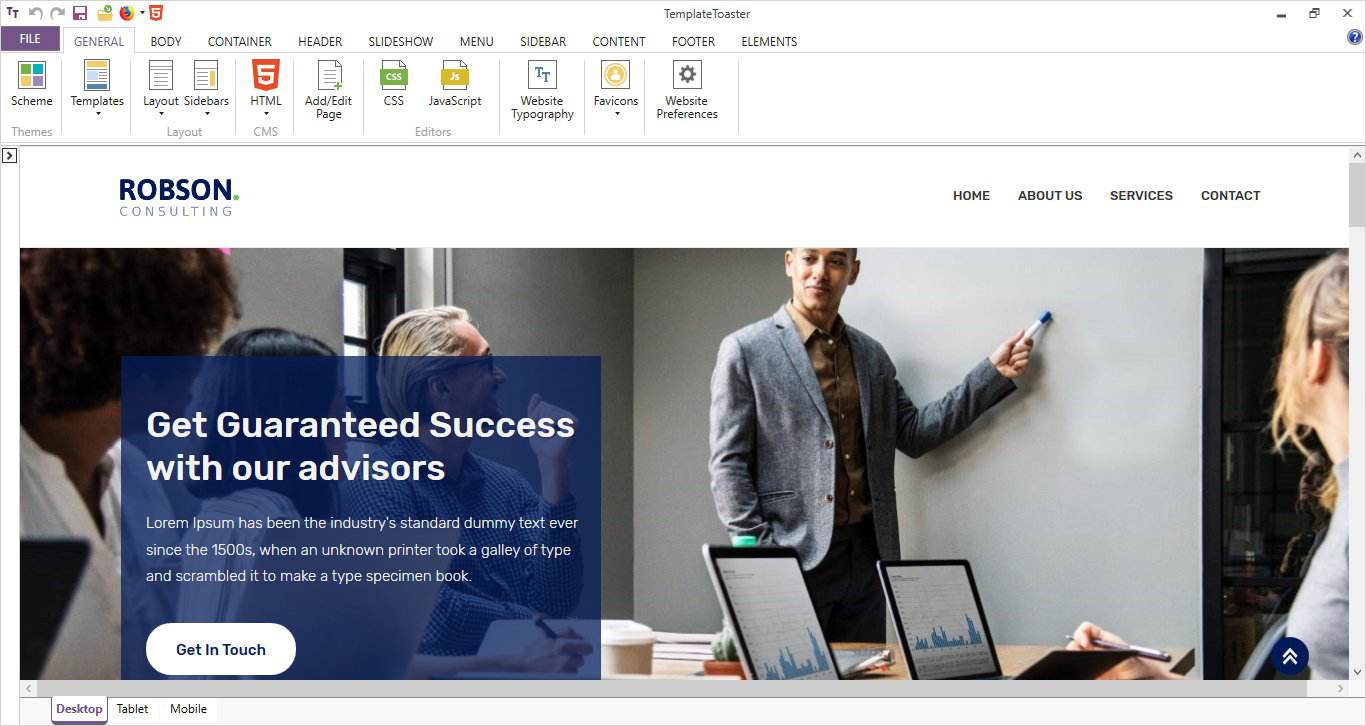
Step 4: Setup Layout
Set the layout for the container either Fixed or Fluid. And the width, margin, border as you like. The texture, effects, and typography can be adjusted as per your requirements.
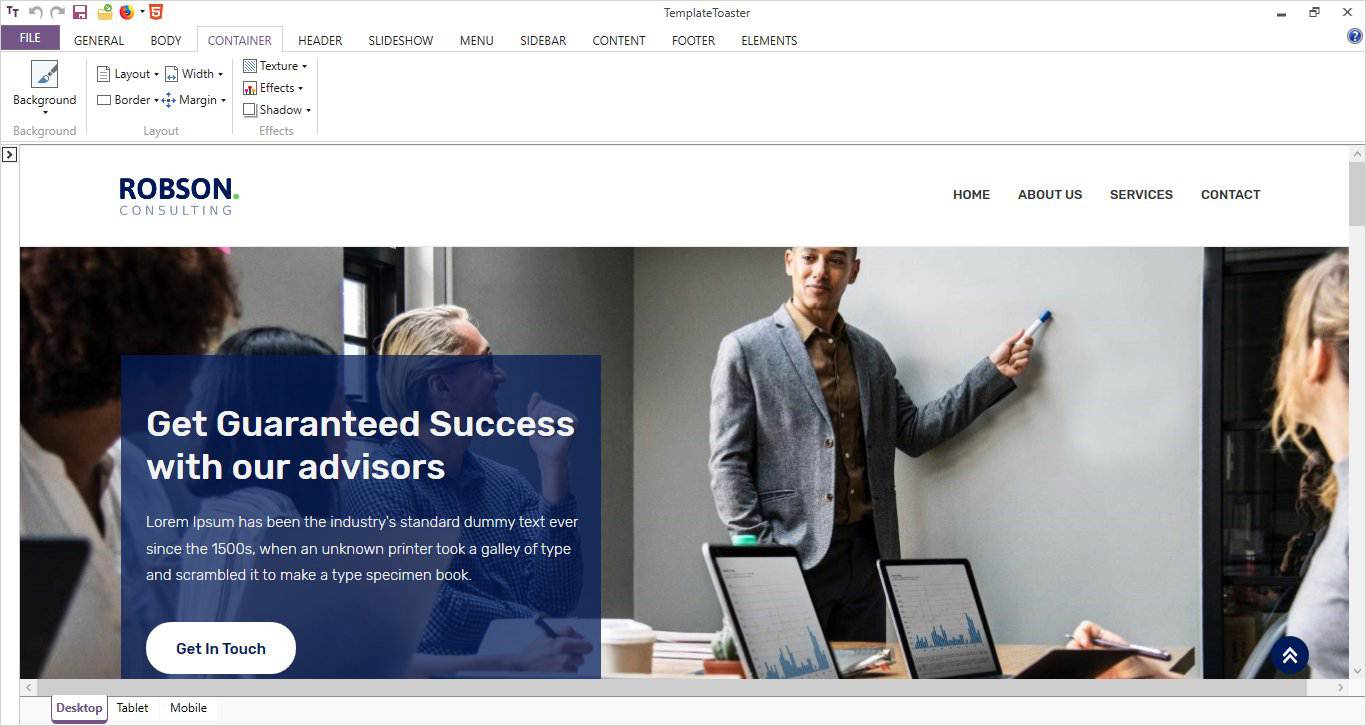
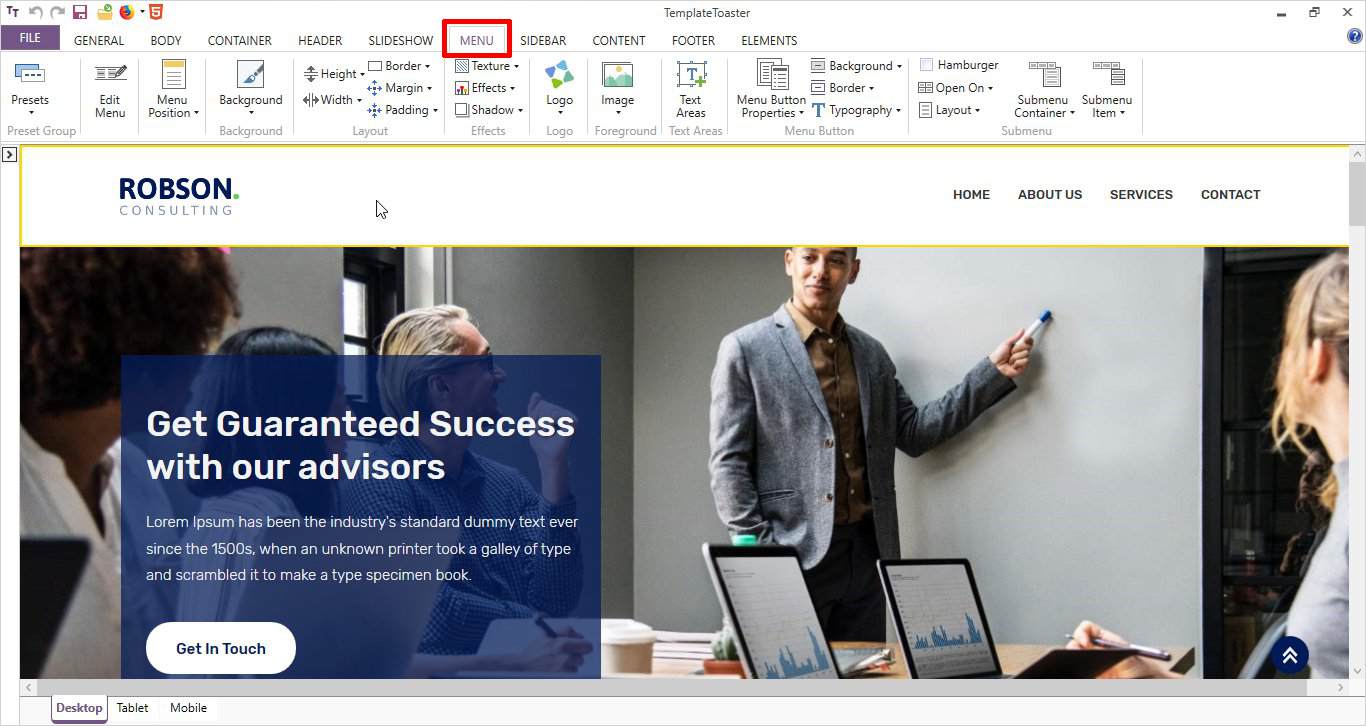
Step 5: Go to the Menu Tab
Then comes the Menu. Here, you will get the options like setting the logo and placing the menu items. Align the menu button either horizontal or vertical. The background color and the typography for the menu can be set separately.
Step 6: Add a Slideshow to the Website
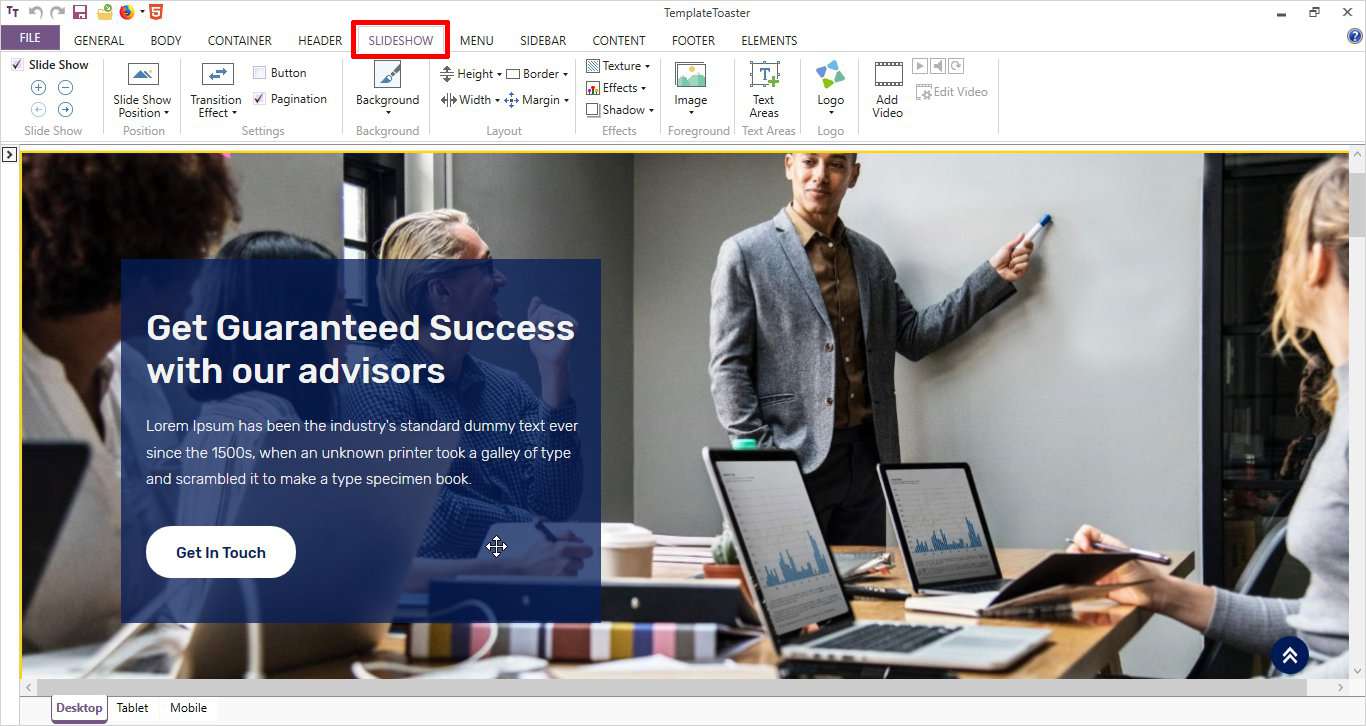
You can add a beautiful slideshow to your website with an incredible facility to include a video in the slideshow. Yes! Set a contrasting background color with a splendid image in the foreground. Use the text area to show your content on the slideshow.
Note: If anytime you feel like making any modifications in the slideshow or in any other part then you can do that by switching the mode from Desktop to Tablet to Mobile. All three preferences are provided at the left bottom. And you can switch the mode at any moment you like.
Step 7: Change Content in the Content Area
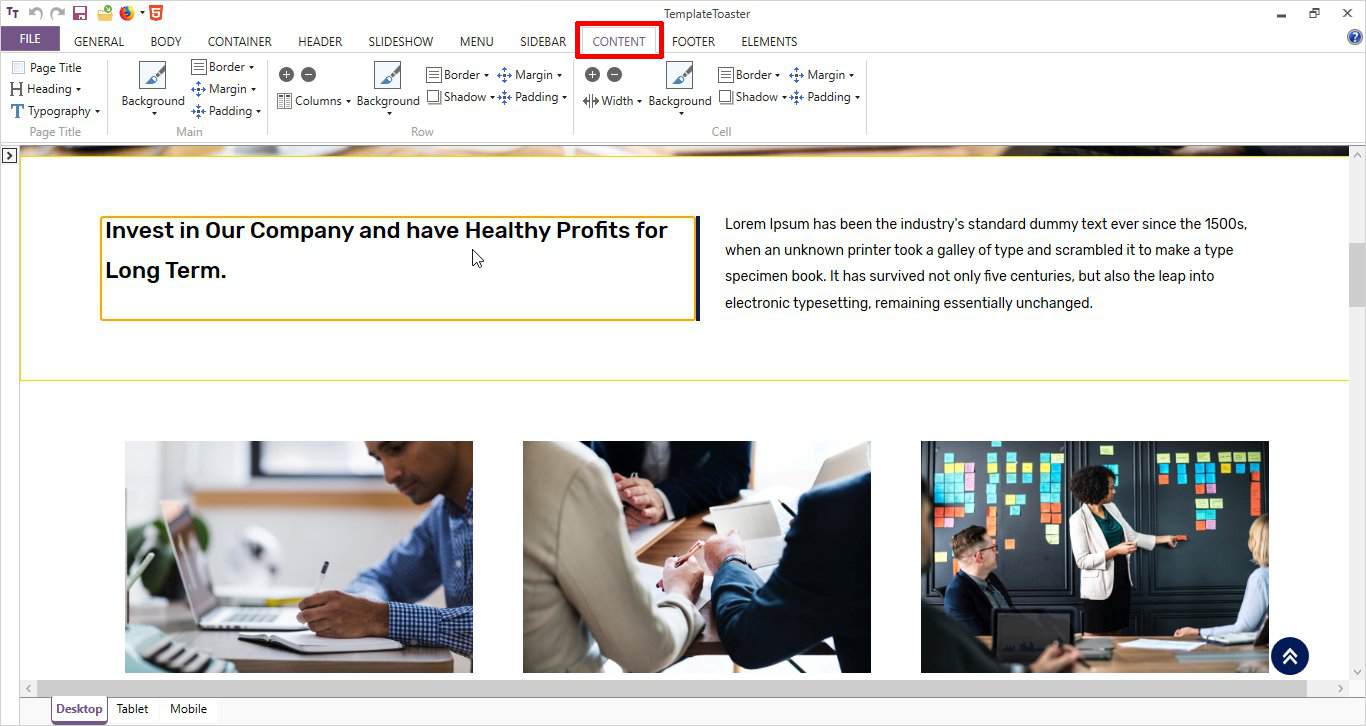
Now, we have the main content area where you can show your valuable content on your site. As soon as you double click on the dummy content, the editor will be enabled and you can edit the content. The editor tab has a lot to offer you.
Step 8: Create Your Footer
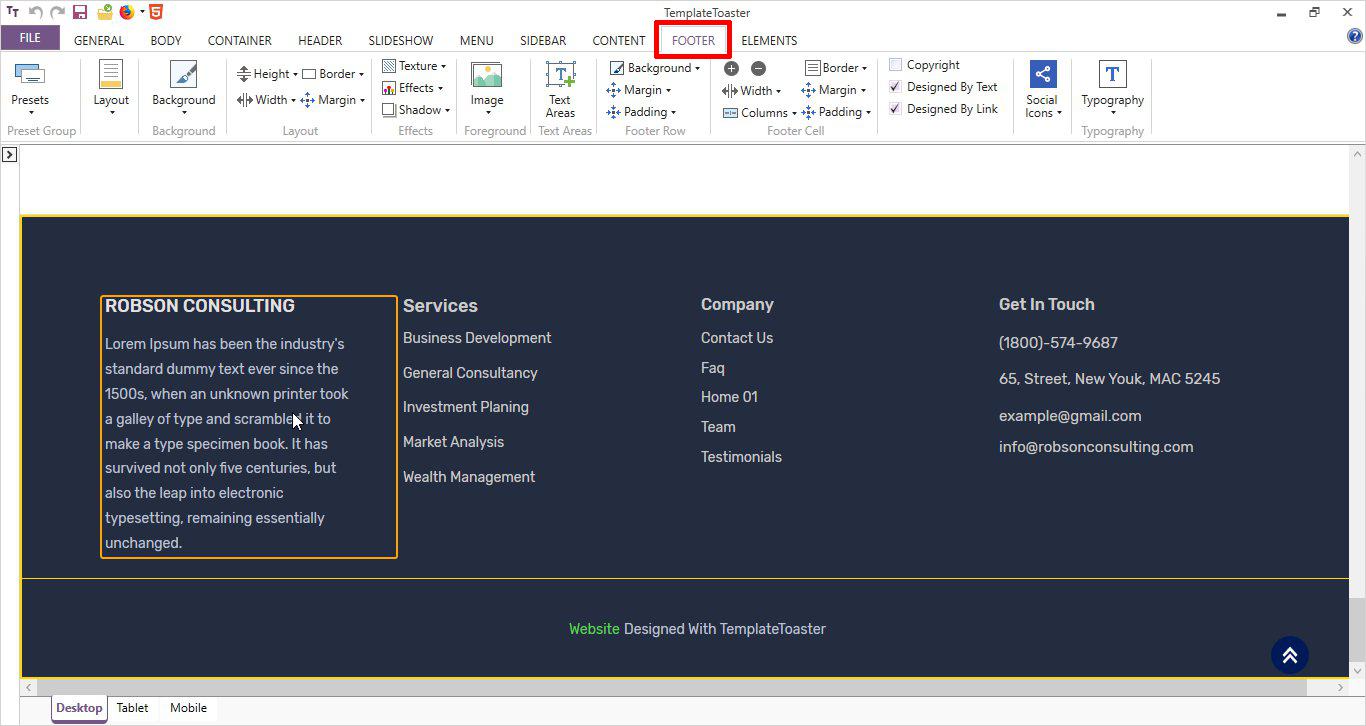
Create your footer now. The footer can be used to add social icons and to add diverse essential information like contact us, FAQs, your address, etc. There are numerous amazing privileges given to produce an elegant footer.
Let me remind you, the template you just created with this website builder is fully responsive in nature. Because TemplateToaster is entirely compatible with Bootstrap.
Once you are ready with your site, time to export it. And as soon as you will export it you can see all the files in the described folder.
Woh! You Are Now Ready to Create a Bootstrap Website
So with the help of these simple steps, you can learn how to create a Bootstrap website and get your responsive website up and running within some time without much hassle. And creating a Bootstraps website with the help of this website maker offers you the assurance of responsiveness without any additional help or plugin.
So, Which Method to Create a Bootstrap Website You Find More Convincing?
Well, this brings us to the end of the article, and I am sure by now you have learned how to create a Bootstrap website with ease. Bootstrap 4 is so extensive that keeps you going and certainly the best way to build a responsive Bootstrap website and web applications. Take ample time to discover what new you can do with Bootstrap 4. You can also read Bootstrap cheat sheets.
How To Create A Website Using Html Css And Bootstrap
Source: https://blog.templatetoaster.com/how-to-create-bootstrap-website/
Posted by: mendelfroule.blogspot.com

0 Response to "How To Create A Website Using Html Css And Bootstrap"
Post a Comment