

How To Draw Flowers With Colored Pencils
In this tutorial, I'll show yous the process of creating a nature-inspired artwork that depicts a peony and cherry-red blossoms, popular symbols of spring and flourishing.
To draw this beautiful floral composition, we will use colored pencils. They are a powerful artistic tool, and the bang-up news is that pencils are very unproblematic to utilize.
What You Will Need
- 2 sheets of paper
- A graphite pencil (I recommend an HB blazon)
- A sharpener
And pencils of different colors:
- Chocolate brown
- Medium grey
- Raspberry red
- Rosy
- Lilac
- Rich blueish
- Emerald green
- Light green
- Xanthous
- Creamy (or lite beige)
- White
My colored pencils are aquarelle, but this feature doesn't really thing. Nosotros'll work without washing the strokes.


1. How to Make a Pencil Sketch of the Flowers
Stride 1
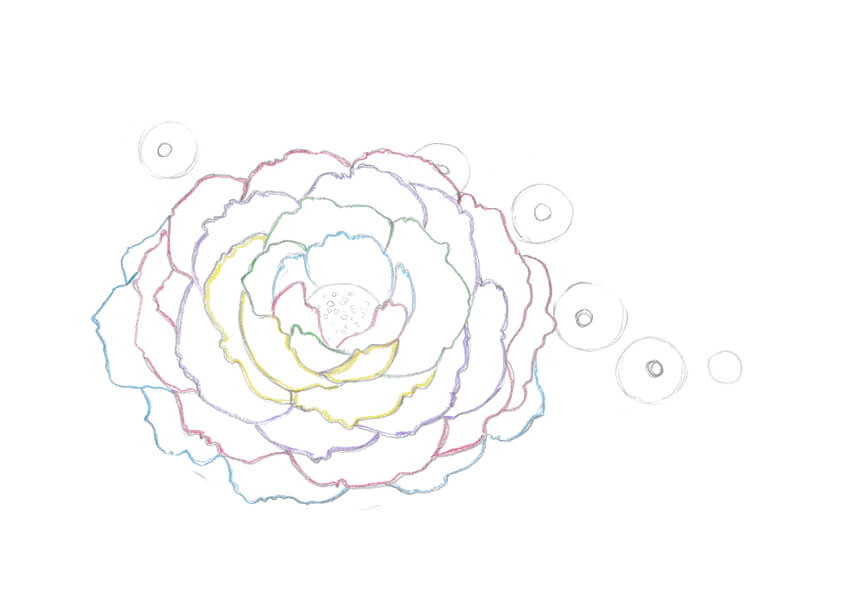
I outline the composition in a general style. With a pencil, I sketch an oval shape for the peony and smaller circular shapes for the cherry flowers.


Step two
I outline the core of the peony and make full information technology with modest circles to marking the texture.


Step iii
I draw the beginning primal petals of the peony. I as well outline them with a blue pencil; I will be applying a new color to each new group of petals and then you tin can easily differentiate them.
The choice of adding any colors to your sketch is entirely up to you.


Step 4
I draw a couple of new petals in front of the existing ones and outline them with a red pencil.


Step v
I depict an overlapping petal and a group of several rear petals. I mark them with the green colour.


Pace 6
I add several foreground petals and outline them with yellowish.


Pace 7
I imagine that the petals arrange themselves around the core of the flower, and add another layer. Then I mark the new group with a lilac pencil.


Pace eight
One more than layer of petals, and this time I outline them with red.


Step nine
The peony is most complete. I add together several more than petals that hibernate underneath and outline them with a blueish pencil.


Pace x
Information technology's fourth dimension to marker the central parts of the ruby-red blossoms. I describe pocket-sized circles with a pencil.
It is non necessary to put these circles exactly into the geometrical centers of the flowers. The blossoms are facing in slightly different directions; moreover, they are organic objects that can't await equal.


Footstep 11
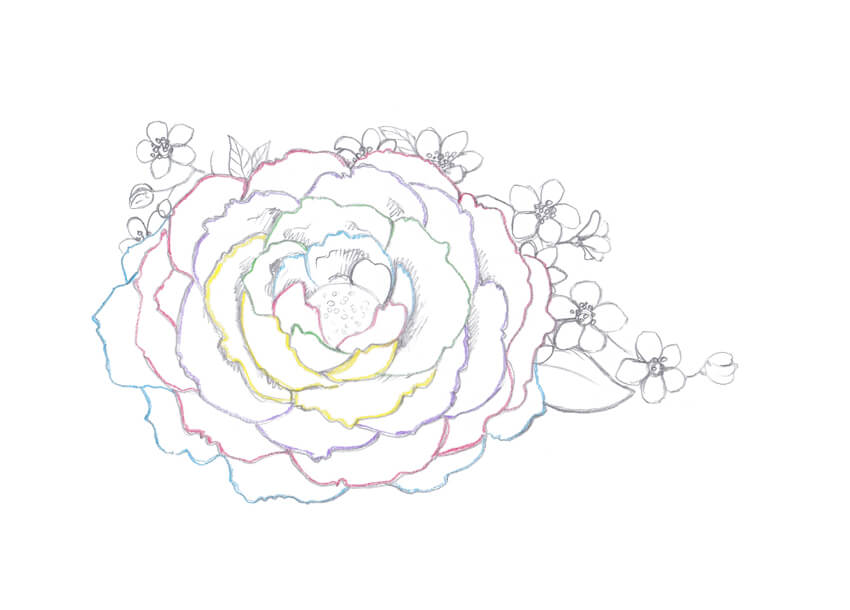
Each ruby-red flower has five petals, and I add them with pencil lines. It is likewise a not bad fox to diversify our floral composition with a small cerise bud.


Step 12
I add new details, such as a twig line, a couple of leaves, and new flowers.


Step 13
I draw a peony leaf in the foreground. I also add stamens of the cherry blossoms; they wait like modest circles.
Our pencil sketch is complete. You can leave information technology as it is now or marker shady areas, as I did for the central part of the peony, separating the petals with shadows.


2. How to Apply Pencil Strokes
Step i
Colored pencils can help you reach amazing results. There are several principles to call up, and ane of them is the importance of creating layers of colour. An overlap of tints and shades creates a much more interesting, impressive result than just one color.
The first way you can apply your tool is by making lines with soft rubbing strokes, holding your pencil at an angle. The lines tin can be directional...


… or rounded. This kind of stroke is perfect for smooth textures and a base color layer.


Step ii
Another splendid method is hatching. It is very like to cartoon with an ordinary pencil or pen; the point of your colored pencil should be precipitous.
Hatching works all-time for adding details and drawing refined objects or textures.


3. How to Draw Flowers With Colored Pencils
Pace 1
I make a clean copy of my pencil sketch, transferring only full general contours with very light lines.
For this step, I recommend using a grey pencil from your colored pencils set, and not a graphite pencil. Lines made with a graphite pencil can mix with the colour and make it seem dirty.
The lines that you see in the epitome below are barely visible in real life. I intensified them while editing the scan so you could encounter them distinctly.


Step 2
I use a pencil of the flossy color to embrace the peony shape with soft rubbing strokes.


Stride 3
With the lilac pencil, I add color to the central parts of the ruby-red flowers. I draw the hatches from the cadre to the petals.


Step four
I apply the calorie-free green color to the leaves and the twig.


Pace v
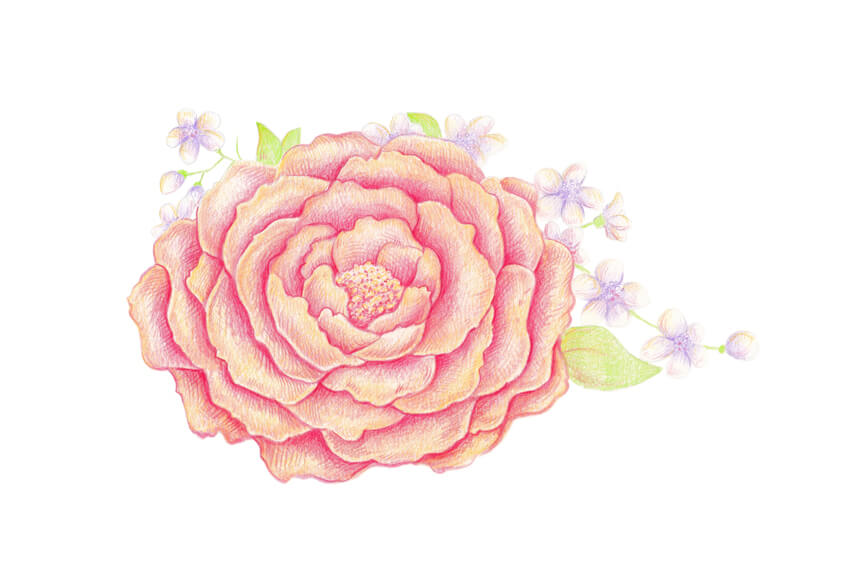
I create an additional layer of theyellow color on the peony, accenting the upper parts of the petals.


Footstep vi
I add together the rosy color, aiming at the dark places of the flower. It helps me in separating the petals one from another.
The point is most applying a torso of color, not but a single line.


Step vii
I continue increasing the contrast with the rosy color.
The bending parts of the petals are spotlit, so I avoid making them as well bright.


Step 8
I consummate the process of applying strokes with the rosy pencil.
To create a unified wait for the artwork, I as well add together several hatches to the reddish flowers.


Step ix
It is fourth dimension to increment the contrast even more. I add together the raspberry scarlet colour to the peony, accentuating the shadows between the petals.


Stride 10
I apply hatches with the emerald green pencil to add details.


Step 11
I use the grey pencil to mark the contours of the cherry flowers. It'south important not to overdo the drawing; the ruby blossoms should stay light.


Step 12
It is time for blending with the white pencil. I use it on top of the grey strokes and shade them. The result is a smoother color transition.
This method is likewise known as burnishing, and I highly recommend using information technology in your drawings.


Step 13
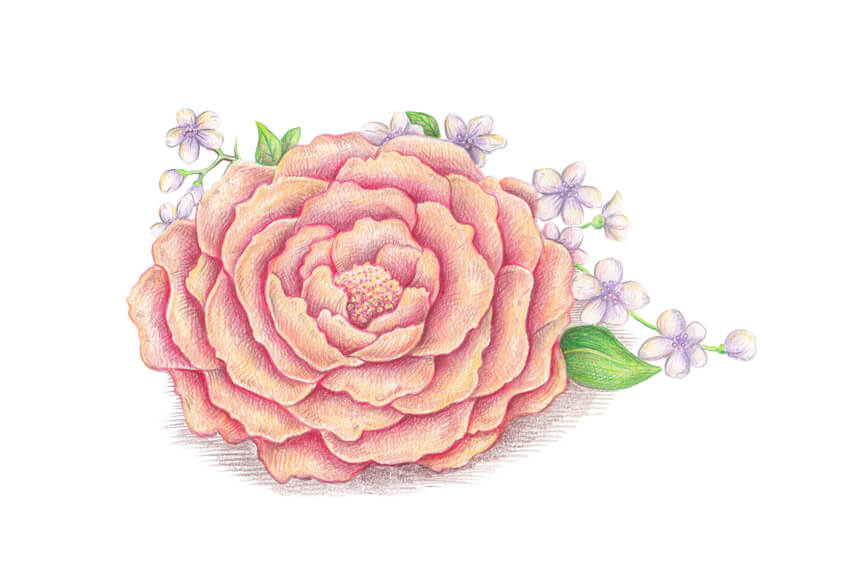
I make my artwork feel more natural past adding thin hatches made with the brown pencil to the shadows. I also create a drop shadow under the peony.


Footstep 14
I apply an additional layer of theflossy color to the peony. It looks more than warm-colored at present.


Pace fifteen
I add some yellowish strokes to the core of the peony and to the drib shadow.


Footstep 16
To make my artwork more interesting, I vary the range of colors with an inclusion of blue strokes.
I add thin hatches to the petals of the flowers and to the driblet shadow.


Step 17
With the medium grey, I intensify the drop shadow.
Information technology is also not bad to add thin hatches to the petals to balance this brilliant artwork.


Stride 18
I evaluate my drawing. Information technology looks nice enough, simply I experience that adding several strokes of theblue colour to the upper parts of the peony's petals is a great concluding touch.


Your Artwork Is Complete
Congratulations, we've created a cute spring artwork! I promise yous became inspired by the flowers and enjoyed the process of drawing with colored pencils.
I wish you much success with this wonderful technique and your creative projects!

Source: https://design.tutsplus.com/tutorials/how-to-draw-spring-flowers-with-colored-pencils--cms-28159
Posted by: mendelfroule.blogspot.com
0 Response to "How To Draw Flowers With Colored Pencils"
Post a Comment